Greenlight: account & rooms
Greenlight is the simplest web interface for BigBlueButton. Instead of sharing raw meeting links by email, you get:
- a user account to log into
- personal rooms with short, memorable URLs
- an overview of past sessions and recordings
- simple settings per room (waiting area, recording, etc.)
Not every BBB installation uses Greenlight. If your organization embeds BBB into Moodle, Drupal, or similar, you don't need Greenlight. When in doubt, ask your IT.
Creating an account
Greenlight is usually hosted at a URL like https://meet-modular.com. On your first visit:
- Click Sign up (or "Register")
- Fill out the fields:
- Name (display name - others see this in rooms you create)
- Password (min. 8 characters, depending on configuration)
- Optional: Email confirmation (you receive a link)
- Account is created - some organizations review accounts manually, which can take a few hours until activation
Login variants
Depending on configuration you can sign in via:
- Local account (email + password)
- Google / Microsoft / Office 365 (single sign-on)
- LDAP / SAML (for companies and universities)
You'll see the available options on the login page.
Registration disabled?
Some organizations don't allow open registration. Then you need an invitation from an administrator - reach out to your IT or the room owner.
The dashboard
After logging in you see your dashboard:
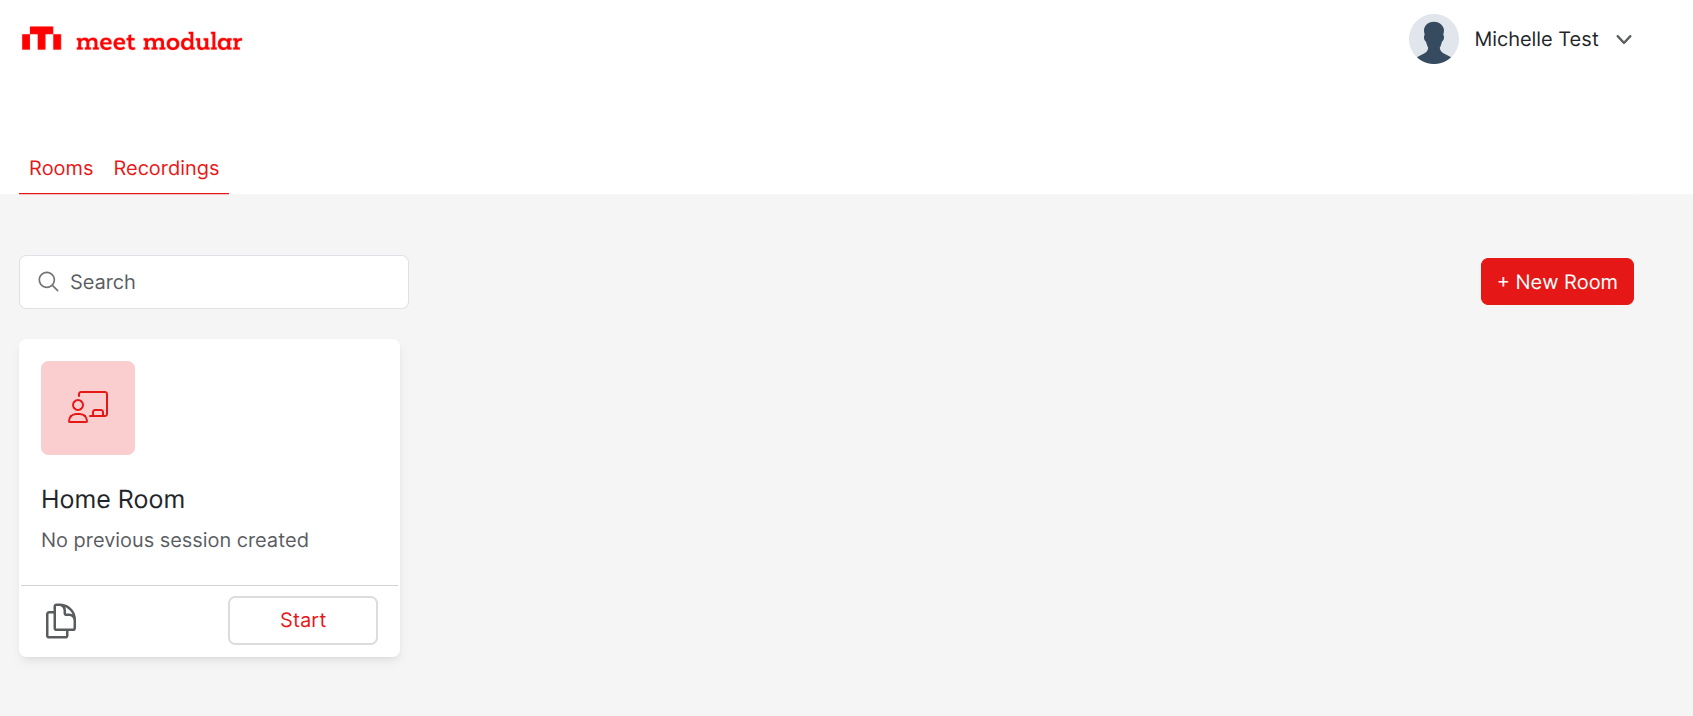
Two things are always there:
- A Home Room - automatically created on sign-up. That's "your" default room.
- A button to create more rooms.
Creating rooms
Click "Create room":
- Choose a name (e.g. "Math - 3rd period")
- Set options:
- Welcome message - shown when joining
- Access code - participants need a password
- Moderator code - whoever enters this code automatically becomes a moderator
- Require approval to join - waiting area is active
- Mute participants on join
- Allow session recording
- Create
The room gets a short URL like https://meet-modular.com/b/mic-abc-def-ghi - you can share that.
Changing room settings
In the room dashboard:
- Click the room
- Settings
All options above can be changed afterward. A selection of the most important ones:
| Setting | What it does |
|---|---|
| Require approval to join | You have to admit every participant manually - good for sensitive sessions |
| Generate access code | Greenlight creates a random code that you must communicate |
| Webcams only for moderators | Participants can't enable cameras - e.g. for lectures |
| Disable private chat | No 1:1 chats - useful for school classes |
| Enable recording | Makes the recording button available in the meeting |
These settings apply at the start of the next meeting - running sessions keep their previous values.
Starting the room
As the owner of a room, you're always moderator.
- In the dashboard click the room
- Press "Start"
- BBB opens in a new tab - you're the first person in the room
As long as you don't actively start the meeting, the room is not reachable for participants (unless you enabled "Allow participants to start the session").
Managing multiple rooms
Typical scenarios for multiple rooms:
- One room per course (e.g. "Math 7a", "Math 7b", "History 8a")
- Per type of event (e.g. "Office hours", "Lecture", "Exercise")
- Personal vs. public room
All your rooms appear in the overview.
Next chapter: Distributing invites and managing recordings - the other half of working with Greenlight.